Virtual Computer Labs
Being away from campus doesn't mean you have to be without your classroom and office technology. . .
Enrolled students and current employees have virtual access to various campus-licensed software while off-campus. VSU virtual computers are available on a first-come; first-served basis, Monday-Sunday, 24 hours a day.- You must sign out of the virtual computer when finished.
- If applicable, you must save your work to OneDrive or another cloud storagae solution.
- The virtual computer automatically restarts after 30 minutes of inactivity.
- Web browser bookmarks are not saved, but you can export them to a file in OneDrive for easy access.
The following campus-licensed software are available on VSU Virtual Microsoft Windows Computers:
General Lab | Faculty and Staff Lab | Business Lab (Finance & Admin Staff) | On-Campus Lab
General Lab (All Current Students)
- Web Browsers: Chrome, Firefox, Microsoft Edge
- Microsoft Office: Excel, Word, PowerPoint, Publisher, Access
- Adobe Acrobat Reader DC
- Notepad++
- IBM SPSS Statistics
- Visual Studio Community with Visual Basics plugin
- SAP Logon
- SAP Lumira Discovery
- RStudio
- jGrasp
- Access to VSU Mac computers are not available.
Faculty and Staff Lab
- All General Lab Applications, EXCEPT IBM SPSS Statistics, PLUS
- Access to V:Drive: click Windows Explorer folder>click VSU Network Drive (V:) under This PC
- Access to USG resources, including Banner, OneUSG, and PeopleSoft
- Access to VSU Mac computers is not available.
Business Lab (Finance & Administration Staff Only)
- All General Lab Applications, EXCEPT IBM SPSS Statistics, PLUS
- Core/Administration access to BannerAdmin, PeopleSoft, OneUSG, etc.
- Access to V:Drive: click Windows Explorer folder>click VSU Network Drive (V:) under This PC
- Access to VSU Mac computers is not available.
On-Campus Virtual Labs (Physical Computers)
Simply log in to the on-campus computer using your VSU username and password.
- All General Lab Applications
- Except IBM SPSS Statistics is only available at select locations:
- Odum Library 3250 and 3270
- New Media Center (NMC) -Odum Library 1st Floor, Entrance Room 1240
- Converse Hall 2007
- EDC 1136-Dewar College of Education and Human Services
- Health Sciences and Business Administration Building (HSBAC)
- HSBAC 3003
- HSBAC 3005
- HSBAC 3021
In addition to an internet-connected computer, keyboard, and mouse, you will need the following technologies to connect to VSU virtual computers:
- Citrix Workspace Application that is compatiable to your device operating system. Mac Users: Find out which macOS your computer is using.
- Microsoft Authenticator App for multifactor authentication (MFA) to securely log in using your VSU credentials.
- Microsoft OneDrive or a similar cloud storage solution to save your work, or a location designated by your instructor. You cannot save your work directly to the remote computer.
NOTE: It is not recommended to use iPads and iPhones to connect to the virtual computers.
1. Install the Citrix Workspace Application (One-time Installation)
-
Download the version that is compatiable to your device operating system.
-
Agree to the Terms and when installing, DO NOT check "Start App Protection" or "Install Microsoft Teams VDI Plugin".
-
Chromebook Users: Add the Citrix Workspace app to your Chrome Browser Extension. Learn how.
-
iPad and iPhone Users: It is not recommended to use these devices to connect to the virtual computers. However, if you elect to use them, do this: Go to the App Store to install the Citrix Workspace app. Open the app and select Get Started.
2. Log into the VSU Workspace Portal
-
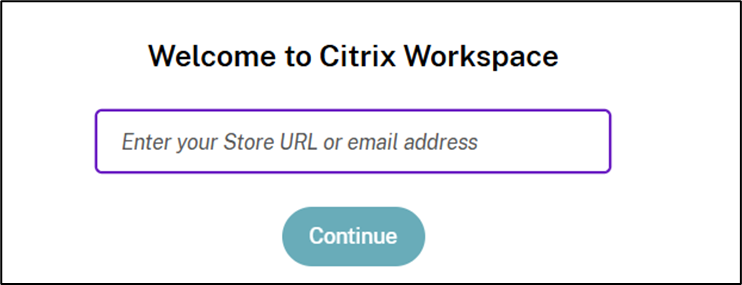
Within the Citrix App, enter workspace.valdosta.edu in the Welcome box. Do not enter your email address. OR In a web browser, go to https://workspace.valdosta.edu
-
Enter your VSU Email and Password.
-
Use the Microsoft Authenticator App to verify your identity.
3. Select a Lab and Login.
- Enter your VSU username only and password.
-
If no computers are currently available, "Cannot start desktop" will display. Try again later.
-
There may be a minor lag in the processing speed.
-
If applicable, save your work to OneDrive or another cloud storage solution. You cannot save your work directly to the virtual computer.
NOTE: If you maximize the virtual PC window, click the small, dotted black banner at the top, click Home; or click Window to resize.
5. When finished, Sign Out of the Virtual Computer.
-
Click the Windows logo > your Profile Name > Sign Out.

-
You are taken to the Citrix Workspace dashboard. Click the X in the upper-right corner to close the app.
To reconnect in the future:
Open the Citrix Workspace app (login if prompted) > Select your lab > Login
Overview
There are many applications available to faculty and staff through the virtual labs, including access to the V Drive and for some, access to specialized business and financial applications. However, there may be a business case where you need to remote into your individual office computer to access software that is not installed on the virtual lab computers.
We offer a solution--Approved Remote Desktop Access!
Get Approved
REQUEST REMOTE DESKTOP ACCESS
Completion of a request does not result in an automatic approval. If approved, notification will be sent to you and your supervisor. Upon approval by VSU Information Security, an IT technician will be dispatched to configure your office computer for remote desktop connection. If denied, an email will be sent explaining why the request was not approved.
Get Connected
Once approved, follow these steps to connect remotely to your on-campus office computer:
- Log into a virtual computer lab as instructed in the section above.
- In the Windows search bar at the bottom of the screen, type "remote desktop" and select Remote Desktop Connection once it displays.
- In the window that appears, type your office computer’s IT Tag Number (the letters "it" followed by a 5-digit number) into the Computer field. Then, click the Connect button.

When prompted, enter the Password for your office computer and click the OK button.
You are now connected to your office computer!
- After 15 minutes of idle time, your remote desktop will timeout. Press any key to continue session.
- A 12-hour maximum length is provided for each remote desktop session. If you are actively using it 15 minutes prior to the end of this window, you will receive a session-close warning.
- Save your documents and sign off prior to the session ending to avoid losing work.
Save Work Files
Employees are responsible for backing up their own files that are saved locally on their office computers. To prevent data loss, employees are strongly advised to save work files to OneDrive, Teams or othe approved cloud-based storage solutions instead of saving locally on their office computers.
Disconnect
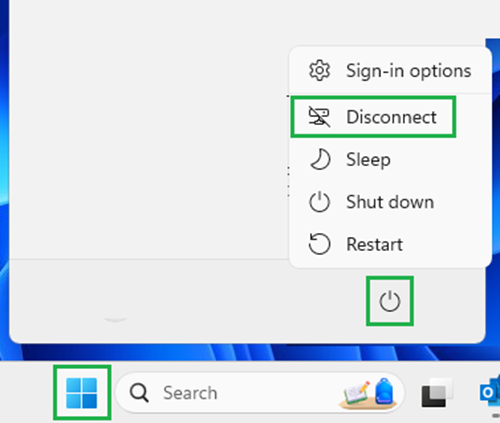
- When you are finished, click the Windows logo on the bottom-left corner of your desktop > click the Power icon > select Disconnect from the pop-up menu.
- Finally, exit the virtual lab itself by clicking the Windows logo > your Profile Name > Sign Out.
Division of Information Technology
- 1500 N. Patterson St. Valdosta, Georgia 31698
-
Mailing Address
1500 N. Patterson St.
Valdosta, GA 31698 - Phone: 229.245.4357
- Fax: 229.245.4349
VSU Solutions Center
Eastern Standard Times
Sun: Closed
Mon - Thurs: 8am to 6pm
Fri: 8am to 5pm
Sat: Closed